Monday, August 25, 2014

九层塔樱桃番茄蒜头炒意大利面 Spaghetti with Basil, Cherry Tomatoes and Garlic

今天是初一,是吃素日。
于是,就趁着刚好买到九层塔和冰箱还有樱桃番茄,晚餐来个炒意大利面吧!
其实,我也不是吃真正的素,充其量是无肉餐而已,因为我有加蒜片。

好喜欢吃九层塔。
放了一大把来炒,炒出来的意大利面带着浓浓地九层塔香,再配上酸酸甜甜的樱桃番茄。
这道意大利面,又是一道令我回味无穷的面食。

材料(1人份):
意大利面                     1人份
九层塔                         约 40 g(约1碗)
樱桃番茄                     4 颗(1分为4)
蒜头                              3 瓣(切片)
橄榄油                          1 tbsp
黑胡椒粒                     1/2 tbsp(压碎)
水                                  适量
盐                                  少许

做法:
  1. 将意大利面跟着包装上的指示煮至8分熟,沥干备用。
  2. 热锅下油,爆香蒜片后,加入九层塔,樱桃番茄和黑胡椒碎,翻炒片刻。
  3. 加入意大利面,拌炒均匀后加入水和盐,焖至水收干即可。

Ingredients(Single serving):
Spaghetti                       1 portion
Basil                               Approx. 40 g(Approx. a bowl)
Cherry tomato             4 nos(Quartered)
Garlic                             3 cloves(Sliced)
Olive oil                         1 tbsp
Black pepper                 1/2 tbsp(Crushed)
Water                             Some
Salt                                  Some

Method:
  1. Cook the spaghetti according to the instructions on packaging til 80% done.
  2. Heat a pan with some oil, saute the garlic, then, add in basil, cherry tomatoes and black pepper. Stir fry for a while.
  3. Add in the spaghetti and stir til evenly mixed. Then, add in some water and salt and let it simmer til the water dries out. Ready to serve.


蒜香大葱虾肉块 Fried Garlic,Onion and Prawn Fritters

这道《蒜香大葱虾肉块》是我上个礼拜到姐姐家时准备的。
但我只顾着跟我姨甥玩,所以没有及时上食谱。
一直在上最新的,结果拖到今天才来上这个摊了一个礼拜的食谱。
嘻嘻~

炸出来的炸物里头有着软软的洋葱和虾肉碎,外头则脆脆的。
如果当时有一罐啤酒的话~~~~呵呵。。
这道小吃拿来下酒就最好了。
*我这酒鬼*

炸出来的炸物还挺大一盘,我觉得还蛮多的。
原本我以为一定会吃不完,因为姐姐家翁和姐夫看起来不像是爱吃炸物的人。
所以,我认为一定会剩下一些可以拿来一边看戏一边吃。
但是,最后一件都不剩啦。
姐姐说她喜欢这道小吃。
英式柠檬蛋糕不合姐姐口味,好在这一样终于合她的口味了。
呵呵。。有点小开心~
材料(约20个):
大洋葱      1-2 颗
蒜头           1 颗
鲜虾           160 g
普通面粉 200 g
玉米粉      20 g
发粉           1 tsp
盐                1 tsp
水                适量

做法:
  1.  将大洋葱,蒜头和鲜虾剁碎。
  2. 把所有材料混合在一起,并酌量加入适量的水,混合成浓稠的面糊。
  3. 热锅下油,用汤匙将混合物舀进油里,以中小火炸至呈金黄色即可。
备注: 
  1. 若要比较酥脆,可加入多一些水,让其成为比较稀的混合物。
  2. 可加入青葱或辣椒碎来增添口味。


Ingredients(Approx. 20 pcs):
Onion                      1-2 nos
Garlic                      1 nos
Prawn                     160 g
Plain flour             200 g
Corn flour             20 g
Baking powder      1 tsp
Salt                          1 tsp
Water                      Some

Method:
  1. Finely chop onion, garlic and prawn. 
  2. Mix all the ingredients together and add in some water to make it into thick batter.
  3. Heat a wok with oil, scoop a tablespoon of the batter into the oil and fry over medium-low heat til golden brown in color. Ready to serve.
Note: 
  1. If a crispier texture is wanted, more water should be added to form a more watery batter.
  2. Chopped spring onion and chili can be added for variation of taste.
I'm linking this post to the event 'Little Thumbs Up' organized by Zoe of Bake For Happy Kids, Doreen of My Little Favourite D.I.Y, and hosted by Diana of The Domestic Goddess Wannabe

Sunday, August 24, 2014

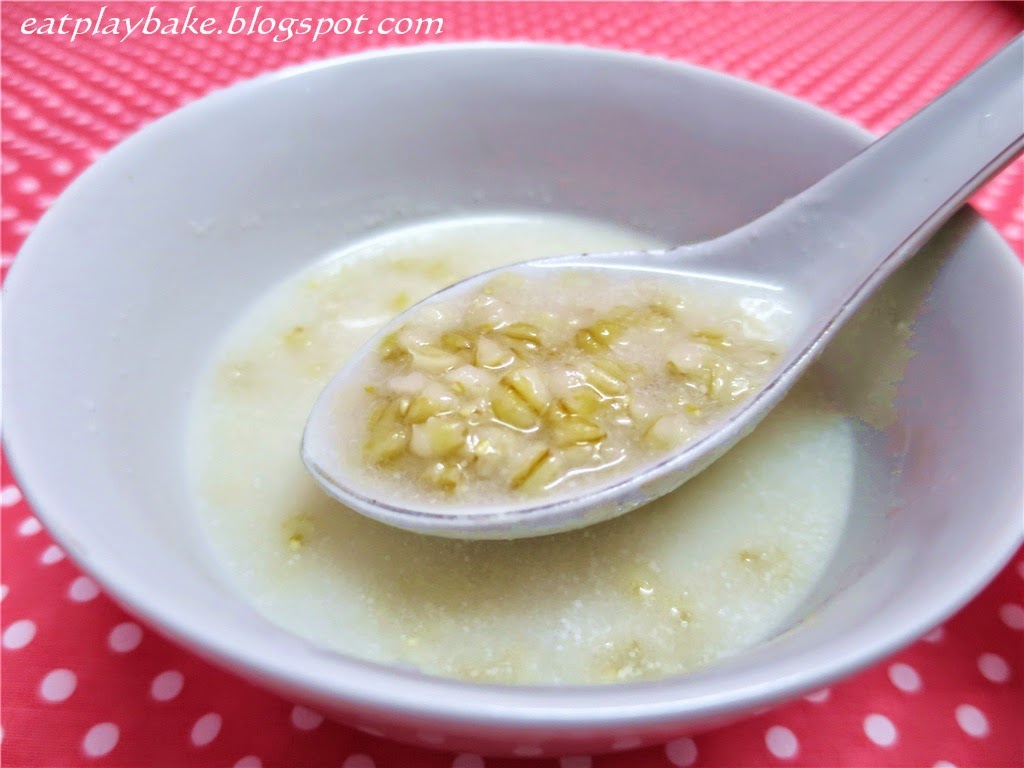
椰香麦粥 Sweet Wheat Porridge (Bubur Gandum)

 
从上个礼拜就一直想喝麦粥,但不知道麦粥里的麦粒是长什么样子的。
上网谷歌了一下,就去菜市买了一小包回来。
原来麦粥里麦粒,俗称为‘干冬’,因为是从马来文的gandum翻译过来的。
昨晚浸了一些,迫不及待想快点天亮。
真的很想很想喝麦粥。

今天,睡醒后就开火煮麦粥了。
用焖烧锅煮,不用看火,加上已经浸泡隔夜的麦粒已经发大了,所以很快地,麦粥就可以吃了。
我买不到班兰叶,所以煮出来的麦粥并不像外面卖的那么香。
但是,甜甜的麦粥带着一丝咸咸的味道和淡淡的椰香,还算好吃。
我还是吃了两大碗。。
呵呵。。

更新于30/9/2014:今天又煮了麦粥。这次,有加了班兰叶,所以煮出来的麦粥更香了~
Updated on 30/9/2014: I cooked sweet wheat porridge again. This time, I added some pandan leaves in the porridge. The porridge tastes better with a hint of pandan aroma~

材料(5-6人份):
麦粒                  250 g
椰浆                  200 g
白糖                  适量
盐                      少许
班兰叶             3 根(绑在一起) 
水                       2 litres

做法:
  1. 将麦粒浸泡隔夜。
  2. 倒掉泡麦粒的水,再加入清水和班兰叶,以大火煮约20分钟后,将焖烧锅内锅锁入保温锅,让其自行焖煮约两个小时。
  3. 捞出班兰叶不要,加入白糖和盐调味后,再加入椰浆,以中小火煮至沸腾后,盖上锅盖焖约15分钟即可。
Ingredients(5-6 servings):
Wheat (Gandum)  250 g
Coconut milk        200 g
Sugar                       Some
Salt                          Some
Pandan leaves       3 stalks(Tie them together)
Water                     2 litres

Method:
  1. Soak the wheat overnight.
  2. Pour off the soaking water and add in clear water and pandan leaves. Heat it over high heat for approx. 20 minutes, then, lock the inner pot of the thermal cooker into the insulating container and let it cook for approx. 2 hours.
  3. Remove the pandan leaves. Add in sugar and salt to taste followed by coconut milk. Bring it to boil over medium-low heat, then, cover the lid and let it simmer for approx. 15 minutes. Ready to serve.

Saturday, August 23, 2014

吞拿黑橄榄三明治 Tuna and Black Olive Sandwich

在三明治当中,吞拿鱼是我最爱的口味。
每次去Sxbway,我都会点吞拿鱼口味的。
每当大口大口地咬下那三明治时,里头满满的吞拿鱼总让人感到满足。

今天,做的虽然不像在Sxbway买的三明治那样,夹着多种馅料,但,是我最爱的吞拿鱼口味,还夹着黑橄榄,洋葱和牛油生菜。
不一样的三明治,但一样地好吃!
材料:
白土司           6 片
牛油               适量
牛油生菜      10片
罐头吞拿      1/2 罐
洋葱               1/2 颗(切碎)
黑橄榄          10 颗(切片)
美奶滋          适量
白糖               1 tsp

做法:
  1. 罐头吞拿倒掉盐水或油后,加入美奶滋和白糖混合均匀。
  2. 于白土司的一面涂上牛油后,依序铺上生菜,调味吞拿鱼,黑橄榄和生菜,再盖上一片白土司。
  3. 将白土司的边切掉,再斜切半即可。
备注: 
三明治可以立刻食用或先冷藏后再食用。

Ingredients:
Toast                 6 slices
Butter               Some
Butterhead      10 pcs
Canned tuna   1 can
Onion               1/2 nos(切碎)
Black olives     10 nos(切片)
Mayonnaise    Some
Sugar                1 tsp

Method:
  1. Pour the brine or oil off the tuna, then, add in mayonnaise and sugar and mix well.
  2. Apply some butter on a side of the toast, then, place butterhead, seasoned tuna, black olives and butterhead accordingly on the toast followed by another slice of toast.
  3. Cut off the edges of the sandwich, then, cut it into half diagonally. Ready to serve.
Note:
It can be served immediately or after refrigerated.

Thursday, August 21, 2014

斑马牛油蛋糕(分蛋法) Zebra Butter Cake (Yolks-Whites Separated Method)

话说在姐姐家做了英式柠檬蛋糕,所以冰箱还剩下牛油和牛奶。
为了在离开前解决掉它们,我做了牛油蛋糕,还趁机试了分蛋法和做斑马纹。

当我将面糊准备好时,看到那么浓稠,我不禁在想,这是对的吗?
也不管了,就试试吧!
一边弄斑马纹,一边敲烤模,让面糊能够往旁边扩散。
还好,最后出来的成品还算不错。
(至少比我几个月前做的斑马烤鸡蛋糕的斑纹来得好看一些些)

姐姐说牛油蛋糕要趁热吃才好吃,因为上面的crust脆脆的。
但我比较喜欢把牛油蛋糕放一夜后,让其回油后再吃,因为吃起来的口感比较湿润。
今早,吃了一片,发觉口感比昨天来得好,因为是我喜欢的湿润口感。
可可的味道稍微掩盖了牛油的味道,所以蛋糕吃起来并没有太重的牛油味。
其实,我即喜欢重牛油的味道,也爱可可的味道。
呵呵~

不知道是因为分蛋法的关系还是什么,这次的牛油蛋糕的组织比我以前做的牛油蛋糕来得好。
它不会松散,咬起来时蛋糕屑不会掉满地。
还是那一句,很湿润。
这款蛋糕,我真的很爱!

保留了几片,要留给屋友们吃。
所以,我很快地就将我的份给吃完了。
还真有点不够喉地说~
刚刚,我的屋友问我说,桌上那最后一片的牛油蛋糕可不可以给他吃。
哈哈。。
看来,下次我真的得做两份才够吃。

材料(8寸圆模):
A)
蛋黄              4个
牛油              180 g
细糖              90 g
牛奶              60 g
底筋面粉     200 g
发粉              1 tsp

B)
蛋白               4个
细糖               70 g
塔塔粉           1/4 tsp(我没放)

C)
可可粉           2 tbsp
热水               3 tbsp

做法:
  1. 蛋黄和蛋白分开后,将蛋白收进冰箱冷藏备用。
  2. 将牛油和细糖打发至白。
  3. 加入一颗蛋黄,搅打至完全融合。
  4. 再加入一颗蛋,搅打至完全融合。
  5. 重复(3)至全部蛋黄都加完。
  6. 倒入牛奶,混合均匀。
  7. 蛋白打至硬性发泡。
  8. 把1/2的蛋白霜加入蛋黄混合物,切拌均匀。
  9. 筛入底筋面粉和发粉后,切拌均匀。
  10. 将混合物倒入剩余的蛋白霜内,切拌均匀。
  11. 把面糊分成两半,其中一份加入预先混合好的可可糊,切拌均匀。
  12. 舀一汤匙原味面糊在模底,再舀一汤匙可可面糊在原味面糊上。重复地将面糊间隔地舀在面糊的上面一直到面糊用完。
  13. 将烤模送入已预热160oC的烤箱,中层,烤1个小时或至熟即可。
备注: 
  1. 冷蛋白比较容易打发。
  2. 塔塔粉的用途是稳定蛋白,可用柠檬汁或白醋代替。如果对自己打发蛋白的技巧有信心,也可以省略掉。
  3. 我用的是不沾烤模,所以我没有铺烘焙纸或涂油。如果用的是普通烤模,就得铺上烘焙纸或涂油。
Ingredients(8" round mould):
A)
Yolks                      4 nos
Butter                    180 g
Castor sugar          90 g
Milk                       60 g
Cake flour             200 g
Baking powder     1 tsp

B)
Whites                   4 nos
Castor sugar          70 g
Cream of tartar     1/4 tsp(I omitted)

C)
Cocoa powder       2 tbsp
Hot water              3 tbsp

Method:
  1. Separate the egg yolks and whites, then, refrigerate the whites.
  2. Beat the butter and sugar til pale.
  3. Add in an egg yolk and mix evenly.
  4. Add another egg yolk and mix evenly.
  5. Repeat (3) til finished adding all the egg yolks.
  6. Pour the milk in and mix well.
  7. Beat the egg whites til it forms stiff peak.
  8. Add 1/2 of the meringue into the yolk mixture and mix well with spatula.
  9. Sift in the cake flour and baking powder and mix well with spatula.
  10. Pour the mixture into the remaining meringue and mix well with spatula.
  11. Divide the batter into two portions. Add the pre-mixed cocoa batter into one of the batter and mix well.
  12. Scoop a tablespoon of the original batter on the mould, then, add the cocoa batter on the original batter. Repeat til both the batters have been finished added alternatively.
  13. Put the mould into the middle rack of a pre-heated oven at 160oC and bake for an hour or til cooked.
Note: 
  1. It will be easier to beat the egg whites til stiff peak if they are cold.
  2. The purpose of using cream of tartar is to stabilize the egg whites. The alternatives of it are lemon juice or vinegar. However, if you are confident enough with your egg whites beating skill, you can just omit it.
  3. I used non-stick pan, therefore, i never line it with baking paper or apply oil on the mould. If a normal mould were used, it is necessary to line the mould with baking paper or apply some oil on it.
I'm linking this post to the event 'Little Thumbs Up' organized by Zoe of Bake For Happy Kids, Doreen of My Little Favourite D.I.Y, and hosted by Diana of The Domestic Goddess Wannabe


Wednesday, August 20, 2014

香蒜橄榄油辣椒宽面 Fettuccine Aglio, Olio e Peperoncino

今天想吃意大利面,但发现还剩下一些宽面。
于是,有了这道‘香蒜辣椒宽面’。
做法跟之前的香蒜橄榄油马铃薯意大利面一样,只是我只用了蒜头和辣椒干。
材料真的让人简单得偷笑,但也美味得偷笑。

快乐很简单。
美味也可以很简单。

材料(1人份):
宽面---1人份
蒜头---5 瓣(切片/切碎)
辣椒干---3 条(烫熟后沥干)
橄榄油---2 tbsps
意大利香料---1/2 tsp
盐---少许

做法:
  1. 跟着包装上的指示,将宽面煮熟后沥干。
  2. 热锅下油,爆香蒜头和辣椒干。
  3. 加入宽面,稍微翻炒后,加入香料和盐调味即可。

Ingredients(Single serving):
Fettuccine---1 serving
Garlic---5 cloves(Sliced/ Chopped)
Dried chili---3 pcs(Blanched and drain)
Olive oil---2 tbsps
Mixed herbs---1/2 tsp
Salt---Add to taste

Method:
  1. Cook the fettuccine according to the instructions on packaging. Drain and set aside.
  2. Heat a pan with some oil, saute chopped garlic and dried chilies.
  3. Add in the fettuccine, stir fry for a while. Add in mixed herbs and salt to taste.

Tuesday, August 19, 2014

香菇红萝卜鸡汤 Shiitake Mushroom-Carrot-Chicken Soup

冰箱有很多红萝卜,而自己也很久没有煮鸡汤喝了,所以今晚就来个《香菇红萝卜鸡汤》。
煮出来的汤很甜!
鸡肉很嫩!
我喝了一大碗,觉得还不够,因为实在是太好喝了。
于是,忍不住又拿了一大碗。
要不是要留一些给我的屋友们喝,我想,我真的可以将整锅汤给喝光!
呵呵~

材料(4-5人份):
鸡胸肉(连骨)---2大块(斩块)
香菇---7朵
红萝卜---2根
大洋葱---1颗
白胡椒粒---1 汤匙(压碎)
盐---少许

做法:
  1. 香菇浸温水泡发后切半;红萝卜和洋葱去皮,切块。
  2. 鸡块汆烫后,与香菇水及其它材料放入焖煮锅内锅中.
  3. 在锅内加入适量的水,以大火煮约20分钟。
  4. 将焖煮内锅锁入保温锅内,任其焖煮约2小时。
  5. 最后,加入适量的盐调味即可。
备注:
我很久没有吃鸡皮了,所以这次没有将鸡皮去掉。
如果不想要汤看起来油渍渍的,可以将鸡皮去掉再煮。

Ingredients(4-5 servings):
Chicken ribs(with bones)---2 pcs(Chopped into chunks)
Shiitake mushrooms---7 nos
Carrot---2 nos
Onion---1 nos
White pepper---1 tbsp(Crushed)
Salt---Some

Method:
  1. Soak the mushrooms in warm water til rehydrated, then, cut them into half. Peel the skin off the carrots and onion, then, cut them into chunks.
  2. Blanch the chicken chunks and rinse them. Then, pour the mushroom water and other ingredients into the inner pot of the thermal cooker。
  3. Add in some water and heat it over high heat for approx. 20 minutes.
  4. Then, lock the inner pot into the insulator and let it cook for approx. 2 hours.
  5. Finally, add in some salt to taste. Ready to serve.
Note:
I love to eat chicken skin. If you do not want the soup to look oily, you can remove the skin before cooking.